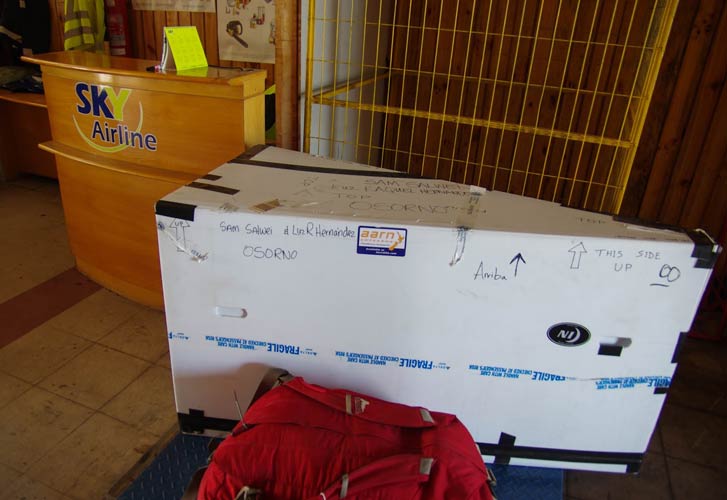
In 2013 we built some wedge of cheese bike boxes out of corrugated plastic to take bikes to the Patagonia Expedition Race. Some clever things were the 2 boxes could be stacked inside each other so when we were flying we were able to break down and fit 2 bikes inside the nested boxes, but for the race each bike got its own box and didn't have to be taken apart very much (just lower the seat and take off the front wheel). In any case, they worked but were not the standard size and would no longer be acceptabe. The standard size is 140cm X 80cm X 30cm
| |
|---|
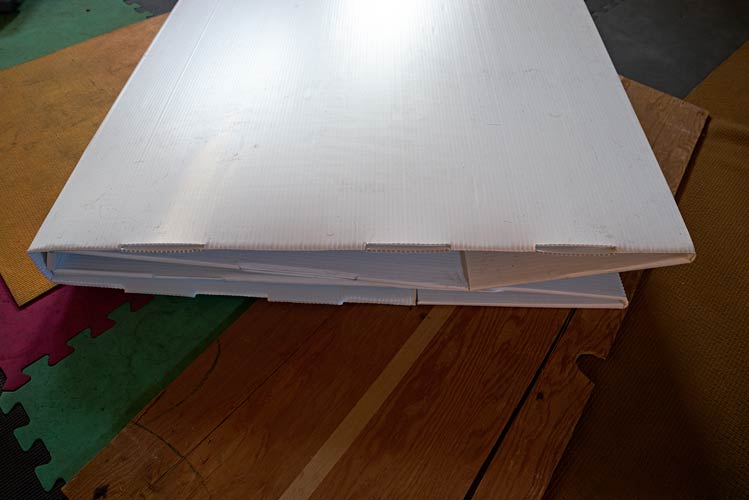
In 2021 I got a chance to do Expedition Oregon but needed a bike box. I poked around online looking for how to make one. Things I discovered is that in other countries they have bigger sheets of corrugated plastic - not here. The solid bike boxes are probably a little stronger and easier to make but they don't break down as easily for storage so I wanted to make a design that would fold down smaller. Somewhat inspired by the orukayak and the bikebox company I tried to wrap my head around a folding box. It hurt my head but I came up with a plan. That is when I realized that Home Depot doesn't sell sheets of corrugated plastic big enough to make the box without some creative cutting and gluing. I hurt my head more trying to maximize the plan. I had access to some leftover bits from previous projects so I wasn't running a total risk when I bought just 2 sheets for my box. I also had to cut them at the store because I was transporting them in a Chevy Malibu. More head hurting later I made a bike box. It wasn't perfect but it worked. The main advantage of this design is that it folds into a flat square when not in use. The main disadvantage is that the top is a little harder to open and close, it might be a little weaker, and it might be less waterproof than a more rigid permanent build. Also it probably takes more thinking, cutting, gluing, and folding to build.
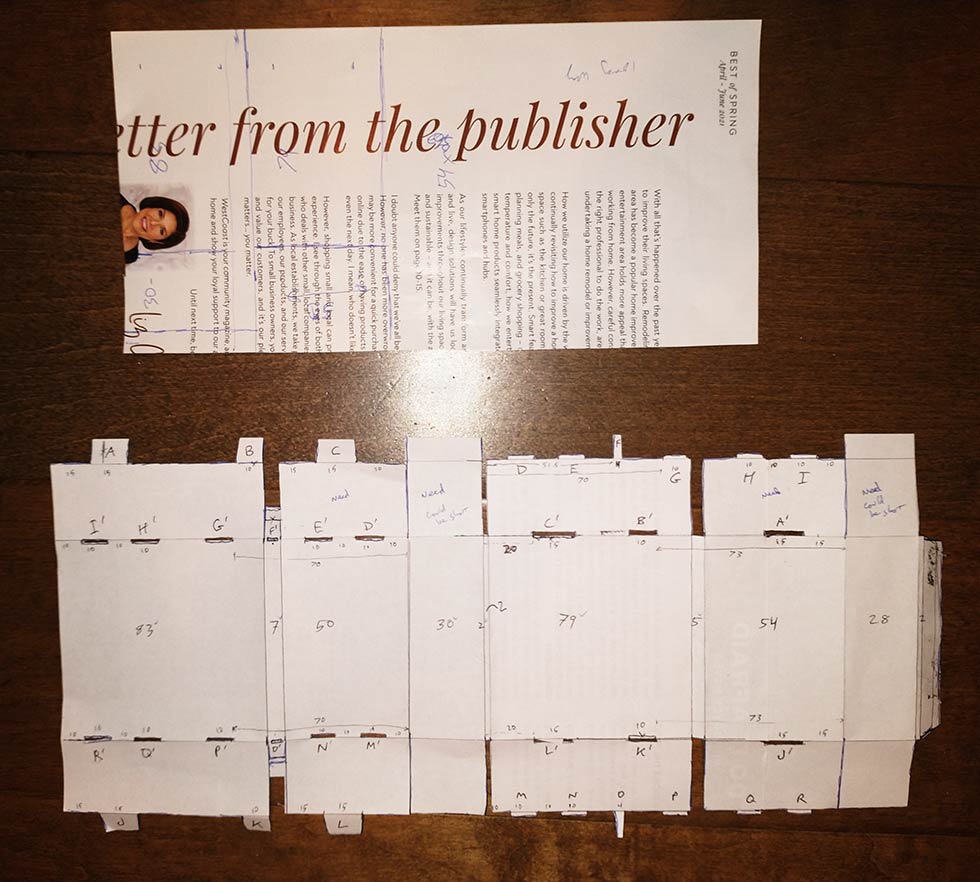
I will try to get a more complete plan someday, but I figured I should get what I have posted. I built a little paper model at 1mm=1cm scale to wrap my head around the cuts, folds, and tabs. I suggest you do similar unless you are very good at spatial reasoning. Don't just blindly follow my instructions as it is quite possible I made a mistake somewhere.
However when Raquel wanted a bike box to fly to PR with her road bike I helped make another box, and it worked. I did have to re-think about the measurements etc. though. We started with 2 full sheets so I could cut them a little differently and we also had additional leftover sheets of plastic to use. One thing I did learn was that you lose some space with all the folds and layers, so instead of making it 140 cm x 80 cm x 30 cm go with 139 or 140 x 79 x 29 and the outside dimensions will be about right.
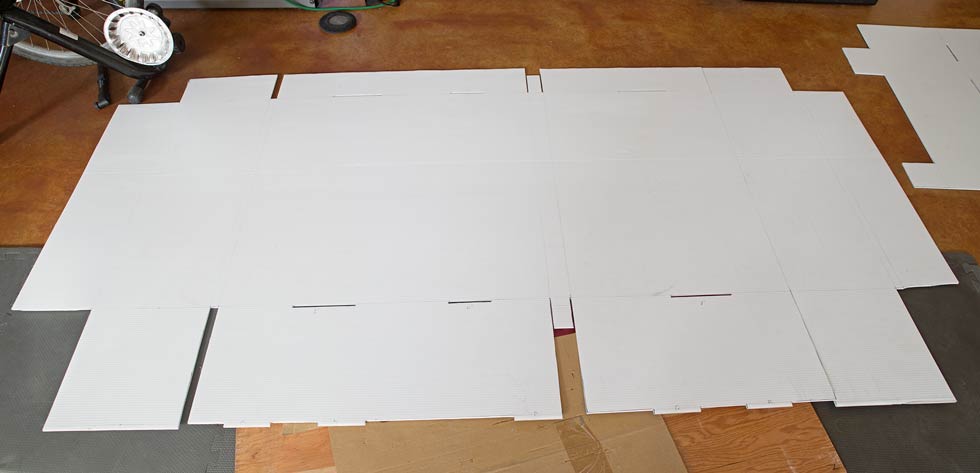
2 sheets of corrugated plastic - I used whatever home depot had - 48" x 96" x .157" but bigger and slightly thicker sheets would be better
some sticky backed velcro
some good tape
maybe not needed, but nice to have - cam buckle strap or 2
sandpaper
glue - I used the brownish standard gorilla glue
something to mark the plastic, cut it, and a straightedge is handy, also a big flat area and something to press glued joints together. If you are an adventure racer you should be able to figure something out. I also used a 4 inch masonry chisel to score the folds - in the first build I used the edge of a kitchen island and a straight edge, I read wooden spatulas work well too.
 |
|---|
 |
|---|
 |
|---|
 |
|---|
 |
|---|
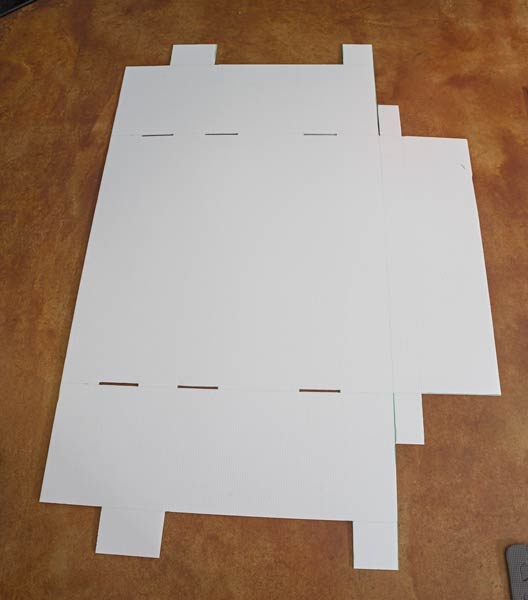
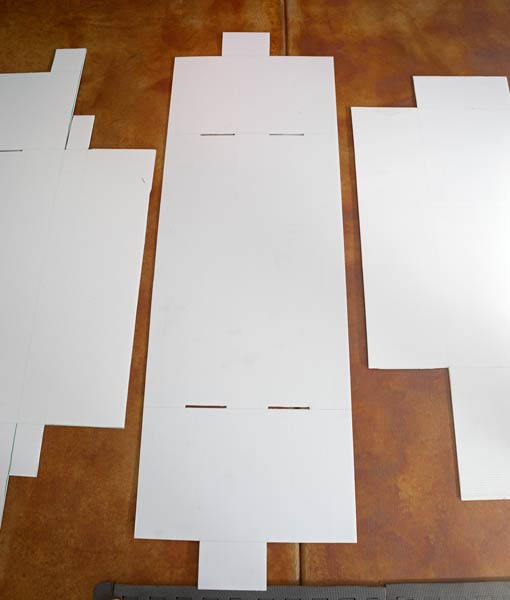
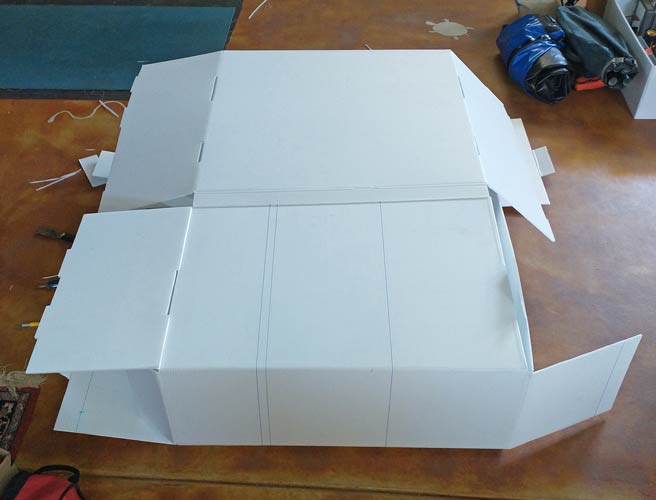
Plot our your pieces, mark them, cut them out, sand the joints, put glue on one side and spray the other with water. Put the joints together and weight them down and wait at least a few hours. I used pavers on one build and boards and rocks and gallon jugs on the other. Repeat for all the joints that need to be glued. Score the folds (you probably want to do this before gluing the last joint). I used a 4 inch masonry chisel for the second build and the edge of a kitchen island and a straight edge for my first build.
Then unfold it and trim as necessary. Then fold it back together putting velcro tape on critical parts. Tape the edges of the glued joints. I also taped up the bottom for the actual race and used the cam buckles to close it for transport. I leave one of the cam buckle straps on the box when folded for storage to keep it folded up. I also used a gear-tie to hold the derailer out of the way for storage and ran another through the box to hold the bike in the center. I also taped a bag to the inside of the box to hold little pieces like bolts from getting lost. The bottom of the bike box turned into a trash can by the end of the race and anything small and loose inside could potentially fall out a corner or a handhold. You probably want to cut out handholds and fold them up and tape them so the race volunteers can move your bike more easily. The easier it is for them the less likely they are to drop it or otherwise jostle your bike.
 |
|---|
 |
|---|
Sorry this isn't a complete how to, maybe someday I'll get around to that plus some better pics, but meanwhile this gives you an idea of how to go about doing it and would have been helpful to me when I started this.
Endless Mountains AR bike box page
Adventure's bike box build page
discussion on bike box builds
google doc plans - uses bigger sheets than easily available in USA