|
Homemade Bikes: installment 2..
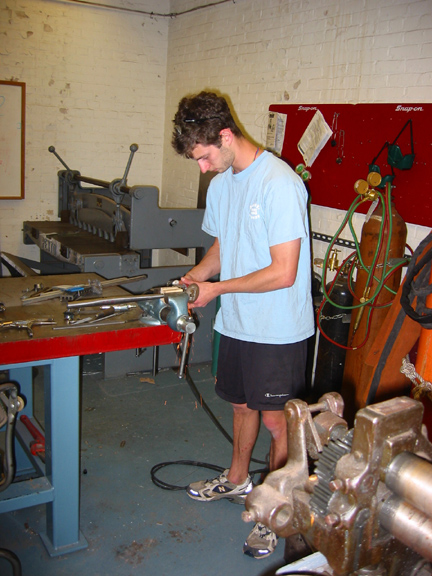
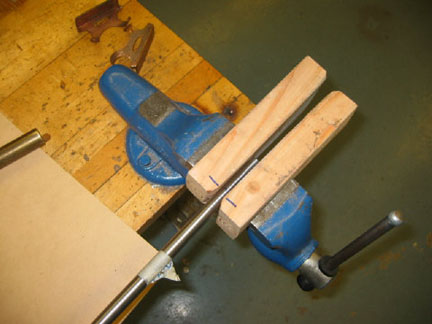
Next step was to slot the stays for the dropouts. I made some caveman-like tube blocks out of hardwood and a wood rasp, and clamped the stays in a vice. I marked the depth of slot I wanted, and used a 1/16" thick grinding wheel to cut the slots just shy of the correct width and depth. I then used a file to bring them out to a tight press fit with the dropouts. I know that a tight fit will not allow braze between the dropouts and stays, but it will save me pinning the joints later, and I am assuming that there will be enough surface area elsewhere to make up for it.
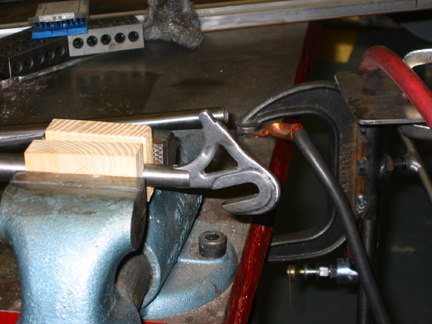
the slot, and inserted dropout.
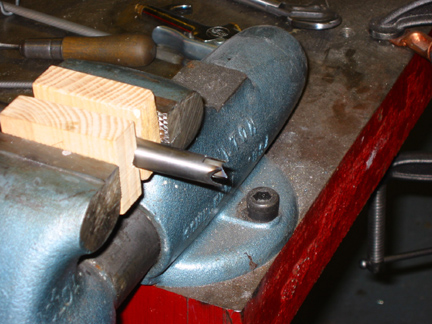
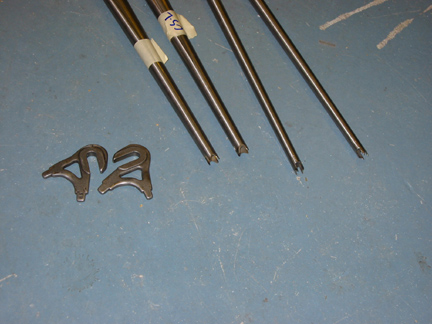
After making the slot correct, I chamfered the stays so they'll look pretty later.
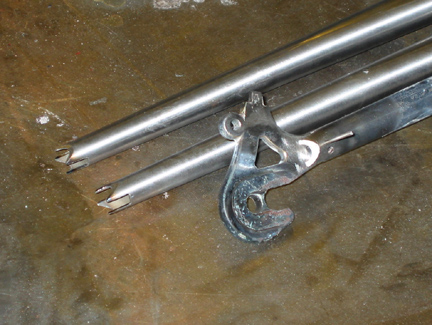
the chamfered chainstays, and a practise joint i made from a junk bike. to prep the practise joint, i hacked off a chainstay, torched it to get the dropout out, cleaned it up, and then pinned it. however, my pin is too loose, so it is floppy and useless. I will braze this joint before the real chainstays to make sure everything is working correctly.
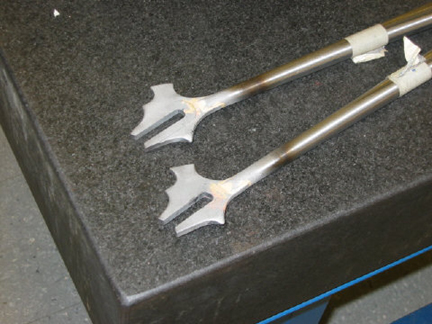
all of 'em, ready to go.
At this point in the process, i hit a small obstacle. it appeared, after my short bouts with the oxy-acet torch that our flux was not going to cut it. No one around here had a correct flux, so we had to special order. This gave me a week of downtime, which sucks because i am running low on remaining days while i am still an enrolled student, and it would have been nice to finish the frame this week so i could show my abandoned friends waht i had been doing all semester. anyways, to make a long story short, this downtime pushed me over the edge- im going to track fork ends now, instead of horizontal road dropouts. i will still maintain that hor road drops are superior for all single speed bikes that want a rear brake. i chose them in this case, never wanting a rear brake, but still thinking they were superior. in this case, due to the combination of short chainstays, and no rear brake bridge, i have finally found the call of the fork end. many thanks to the folks who helped me discover this, especially david williams. however, ordering them now would not only cost me cash (running short, here..), but would also take delivery time. i used my foreseen downtime as an excuse to make my own. i based them on the laser cut crmo track fork ends that henry james sells. (so- thank you henry james.. hope i havent transgressed here...) i saved the picture off his site, and blew it up just a bit until the slot matched his specified travel - 38mm. I then printed it out a few times, decided i would spice it up just a tad with some extra unnecessary metal, and go from there. i chose 1/4" plate of mild steel for the stock, and planned on milling it down to roughly the thickness of the old dropouts so it would fit my pre-cut slots. the first thing i did was cut two pieces of steel, and tack weld them together so that i would make two identical dropouts. I know I read this somewhere in the archives- thanks to whoever posted.
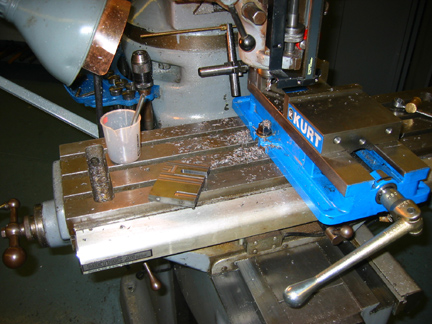
first, i milled the slot. i made it .395" which was the slot size on my real dropouts.
i then milled off 0.022" of thickness, except for what i wanted to remain as a raised face on the outside face of the dropout.
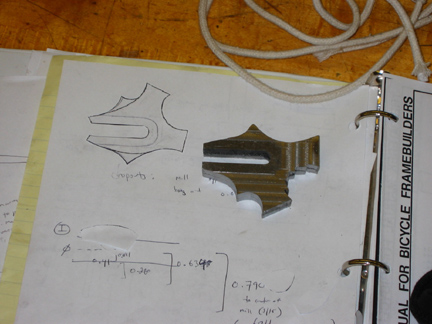
i then roughed out the curved with the bandsaw in many small nibbles, and spent an hour or so filing to clean the curves up. a lot of the tacks (fusion, not filler) cracked during the process, which was interesting. i dont know enough about welding to diagnose why. in the end, i relied on one final tack at the chainstay tab. i went back over this with filler rod to properly keep them together while i was doing all the filing.
When i bent my original dropouts to the correct angles, i used an 8" adjustable wrench on the stay tab, with the dropout in a vice. i tried that with these new dropouts, but it wasn't happening. Two words: cheater bar.
after all the filing, i beveled the edges, cleaned up the rasied area a little, ground off the weld that held the two dropouts together, beveled the backside, and had a generous cleaning session with a wirebrush and a scotchbrite grinder. There are still milling marks and scratches in the dropouts, but honestly, I don't care, and it's nice to see how things were made.
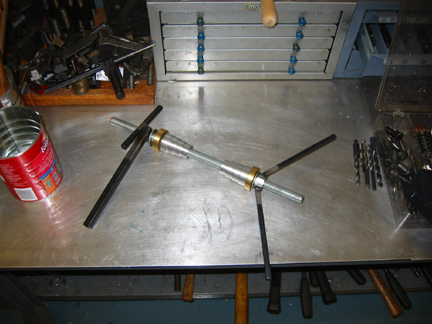
the dropouts only took me a day, so that left many more to kill. so i made a headset press. stepped rings are clones of the park tool. its quite nice, and is set up so no wrench is necessary. many thanks to chalo colina for advice on appropriate metals for this.
among other things, i also made myself enoguh hub spacers to last me a while. imagine- it takes me one semester to make a bike. it takes me one minute to make a hub spacer. maybe i shoudl stick to hub spacers. ;)
i also took the liberty of machining spacers for the rear dummy axle, i am now equipped for 120, 130, and 135mm locknut spacings. these got screwed right onto the jig, becuase id lose 'em otherwise.
i also made a nice handle (completely ridiculous, i know) for my heatsink plugs.
you may remember that i was building this frame with thinwalled headtube stock. thats the last damn time i try this again! anyways, with extensive helpful email from the list, and a lot of archive searching, i decided to put headtube rings on to reinforce the steel where the headset cups are. however, i coudlnt afford for the metal to warp, so i went with heatsinks- a fat copper plug that slips in tightly. i planned on making the rings out of crmo bicycle rubing scraps from the DT. however, i didnt really do the mental calculations, and that size tubing (essentially the same size as the HT itself) would leave too big a gap where i split the ring to fit it over the HT. the shop does not stock crmo, and i coudlnt wait for some to come in by mail, so i made some fat rings out of mild steel, and hoped for the best. i made them a little longer and thicker than i woudl have with crmo, but im no engineer. maybe they are still too weak to do anything. to enable them to be long, i filed away a section so that they could seat around the DT and TT junctions.
anyways, in my practise rounds, silver soldering the headtube rings on, i coudlnt make it work. no matter how long i spent torching the copper plug beforehand, i coudlnt seem to bring the whole thing up to heat, and was getting consistently crappy soldering. add to this a grave mistake- i cut the headtube to within 1mm or so of where i wanted it to be, so the headtube ring was pretty much right at the top, and if i slipped a bit, or the rod started flowing too much,i would essentialy solder my heatsink into the headtube! needless to say, i was having none of that, so with advice from the shop manager, i lathed two grooves into the inside of each ring, and filled each with a ring of silver solder. i then used a centerpunch to swage little dimples into the inside of the rings so they snapped onto the headtube and stayed in place. i also blackened the heatsink with a straight acetylene flame which the shop manager said would make it unlikely for the molten solder to adhere to it. i then fluxed everythign, inside and out, and heat the whole thing up until i could see silver come out around the full circumfrence. the downside is that there was only enough silver to bond the inside gap. no fillet at all, which doesnt look as nice as it could. i just hope they're actually on to stay. i suppose if they come loose becuase of a no-go soldering job, they will rattle and the headset will be un-reinforced. not a big deal in the general scheme of things.
all this waiting, waiting, waiting, for the flux.. and finally, it came in, ahead of time! amazing! i took apart a couple junkers, and brazed dropouts onto them. the tubing was far thicker than what i will be using, but the process seems very straightforward, and i felt good about the joints, even if the first few needed more cleaning up (filing brass off) than i envisioned. i asked the framebuilder's list, a while ago, whether allstate 21 would be an appropriate flux. this was waht the shop had ordered for me, for use with the low fuming bronze rod we had. no one on the list had an answer, specifically, althouhg two people were Very helpful. first, one fellow whose name i have mistakenly deleted from my email, gave me the heads up that fluxes are not so picky. there is not only One flux that works for a certain rod. after a few emails back and forth i at least knew that the allstate 21, which was all the shop could find to order, was not _necessarily_ incorrect. still didnt know if it would work, though, and some folks on teh list seemed to think it was not a good idea, and so on. anyways, the second person who helped went above and beyond generous. freddy parr, sensing that i was gettign a little frantic, offered to send me some appropriate flux for free. obviously, i must have come across as pretty desperate, and i was (am) hardpressed for cash at the end of the year. anyways, to make a long, complex, and embrassing story short, i ended up using the allstate 21, which worked perfectly, with my rod, and doing my dropouts with that. the allstate 11 nickel silver rod/flux that freddy sent me awaits use on the next bike. i didnt use it for a few reasons. first, the 21 came in earlier than expected, so i had time to practise with it, and the joins looked good, so i figured if it ain't broke.. second, my guy at the shop ive been working at thoguht that nickel silver brazing needs an inert gas atmosphere, and i didnt feel like stepping on his toes. and so on and so forth. anyways, ill be sending freddy the cash for the braze now, as there is nothing more embarassing than taking the handout, and then not using it. rest assured- my next frame will have allstate 11 brazes. period.
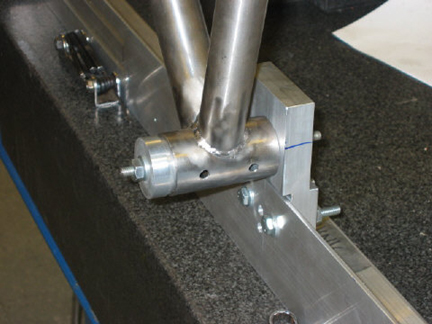
i have horizontal dropouts, and the worst thing i could think of doing was putting them in out of plane with one another. that woudl make it imposible to correctly insert the rear wheel, expect for one spot. anyways, i made this little jig to hold them in line, at the correct height, and tack-welded them together before brazing.
closeup.
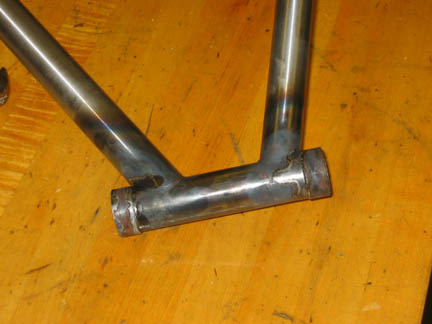
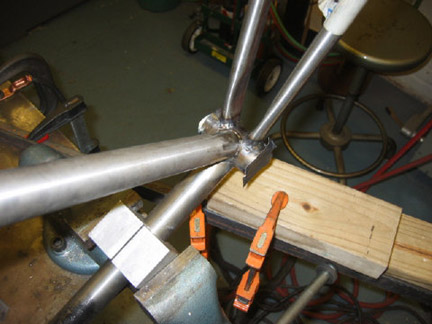
rechecked all the tab angles on the dropouts, and when happy- brazed them to the chainstays. i never really had much instruction, so who knows whether this is a good joint or not.. but it looks good to my eye, i poured a lot of metal in, and the practise joints all held up. my chainstays were far thinner than the practise CS's, so i was pretty scared of overheating, and probably did at some point. on both of the chainstays i had a small part of braze missing from where it should be. on one, a small blob of flux left a crater when i washed it out. on the other dropout, the end of the slot where the tab fits didn't have full penetration. i cleaned up the initial braze a bit, re-fluxed for silver solder, and went in again, with just a little dab here and there. looks great now.
after these brazes, i drilled vent holes near the tab on the inside of the stay, and flushed a lot of hot water throguh the tubes, hoping to get the flux out. i imagine theres still some in there. hope thats not a terrible thing. i have holes in the BB, and vent holes near the dropouts, so i imagine if flux starts rattling around i can always take the BB out, put a tube in, and flush it some more.
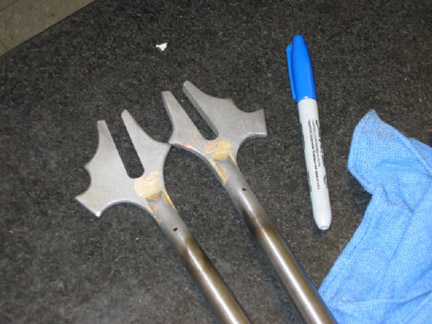
The filed chainstays, cleaned after the
brazing. I used big files to rough out the lumps, a dremel tool to re-cut
the contours between stay and dropout, and plumber's cloth abrasive to
clean up the stays. I drilled ventholes
in both seatstays and chainstays before brazing. the vents may not have
been neccessary, because i also drilled the bottom bracket and seattube. i
chose to put vent holes in because i didnt want any tube in the frame to
have a dead end, for air circulation (to get water out), and if i needed
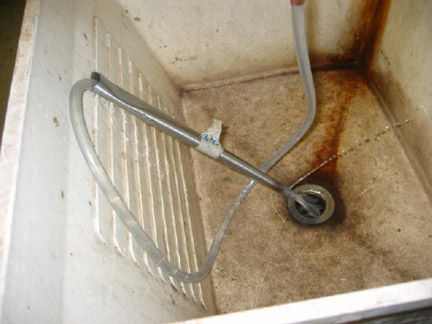
to flush the stays later to get flux out. to get the flux out of the inside of the chainstay, i
ran hot water through the tube for a good half hour. i dont think
everything really came out, as the external flux was a b* to get off.
however, im hoping it got the big lumps out, if any, so that they do not
come loose while riding and jingle around. I wanted more tire clearance, so that I had more
options in rear tires. I definitely wanted room for 28c tires, so i
figured i would mount the stays as far out on the BB as i felt
comfortable, and crimp them as well. I started by cutting them to length
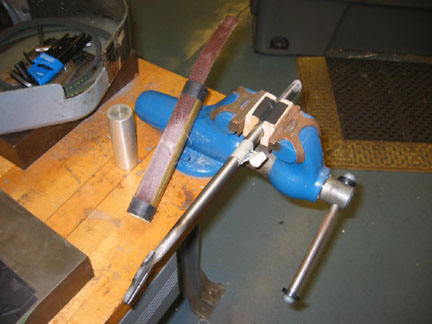
on a cutoff saw. I then ovalized them further tghan they were already
ovalized by smooshing them between two pieces of 2x4. You can see the
lines i drew on the 2x4 and tube to give me a reference so the stays would
be ovalized equally. After I
had ovalized the tubes to where I wanted them, I opted for additional tire
clearance by putting a 1" rod of brass against the tube, and repeatedly
clamping it until i formed a clearance dimple on the inside of the stay. i
have to mention here that this was a caveman-like method. if i had had
the time (remember that whole running short thing) i would have biked down
to the woodshop, bandsawed myself a couple pieces of hardwood to the shape
i wanted, and clamped those onto the tube, instead of a brass rod. the
downside of the rod is that although from a distance, the tire clearance
looks good, from up close, you can see that it is composed of many small
crimps, which look odd. in the end, it turns out that for 28c tires i
woudlnt even have had to do this step, there was already enough clearance.
oh well, now i can mount 32c tires as well. after i was done with the brass rod next, i drilled the bb for the
chainstays. this i did by eye and by careful marking with a marker. i did
the holes for the DT and ST on the mill, carefully centering them to the
thousandth of an inch, aligning them precisely with a pointer, all that
nonsense. as luck would have it, i was so caught up in machining precision
that i forgot to re-center the mill after finding an edge, and drilled one
of my holes exactly .1" off where it should have been. this is a perfect
example of a ridiculous use of a mill. i could have done it by eye and got
it within 0.010", but i chose to do it by machine, didnt pay attention,
and it was way off. fortunately, the tubes were big enough that it didnt
matter, but its symbolic. i made the CS
and SS miters by file. i was tired of the constant fear of bending tubes
in the mill, and not too excited about making a jig to hold the odd shaped
stays in the mill bed. i did it the slow way, which IMO was probably just
as fast or faster than working out the intricacies of milling for this
one-off job. for each stay, i would just mount it in the jig, hold it
against the tube it was to be mitered with, draw with a marker what metal
needed to be taken off, take it out of the jig, belt sand/file it off, and
check again, getting more precise as i approached the correct miter.
for the final cleanup of the miter, I
used a 1.5" brass tube and some abrasive cloth taped on. this very closely
approximated the diameter of the BB (1.535"), or at least was as close as
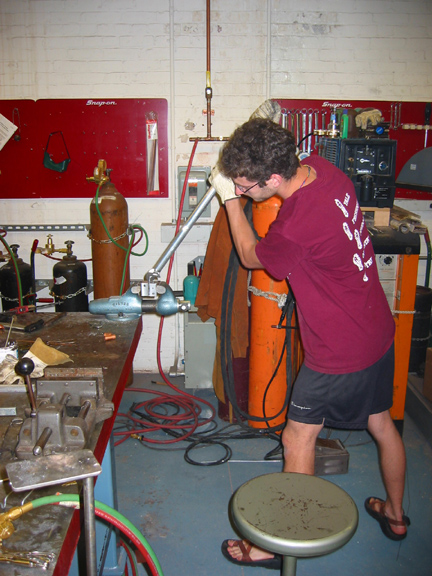
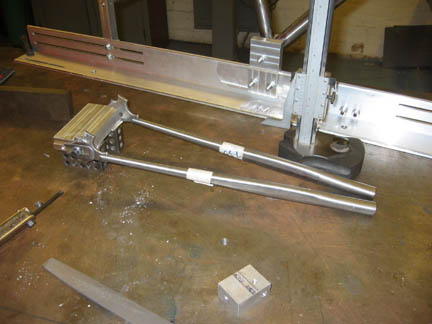
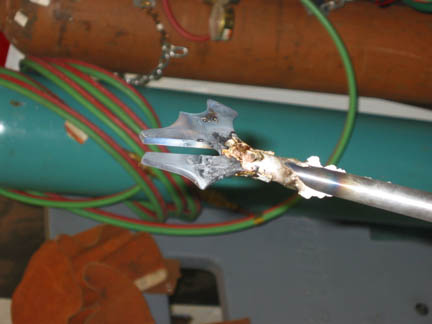
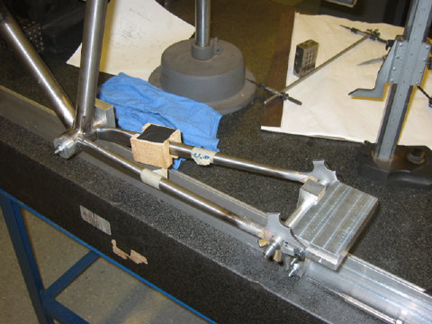
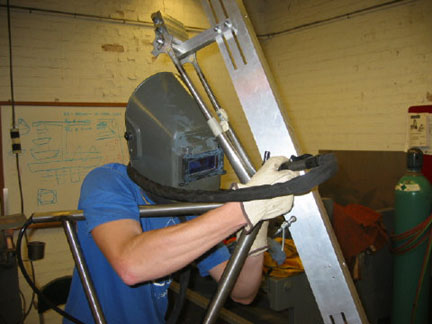
was necessary. welding the
chainstays was quite tricky. here you can see the tape i was using to
purge/back-gas the tubes.
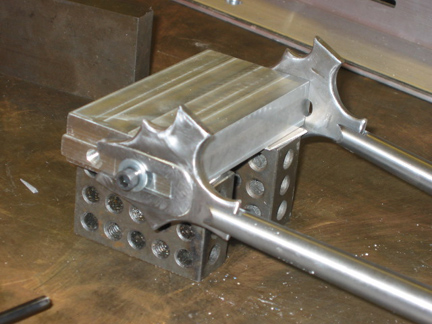
to get at the inner stays, or the underside of the jig, i had to clamp the
whole thing in a variety of odd positions. I imagine a production jig
where you can just spin things around is worlds of help here.
|