|
Homemade Bikes: installment 3..
i suppose my inexperience shows in terms of
welding. I can weld beautiful beads on all kinds of straight joints, but
with the combination of curved joints, thinwall tubing, and contorted
positions, the TIGing on this project was a real headache. I was happy to
find that welding something as thin as 3/64" is delightfully easy compared
to thin walls like the seattube, and 1/16" steel plate i could weld all
day without so much as burning through once. i guess i have some more
practise to do before the next frame out of ultra light weight steel (yeah
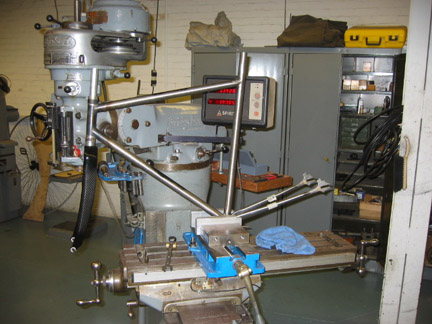
right). i then pulled the rear dummy
axle back, after welding, and checked if the tubes had warped. they had, a
little, and both were a couple mm off where they were supposed to be. I
clamped the BB in the aluminum jaws of a mill vice and aligned them,
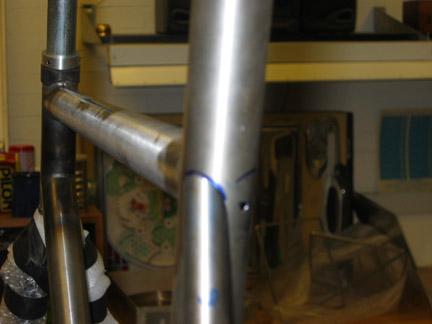
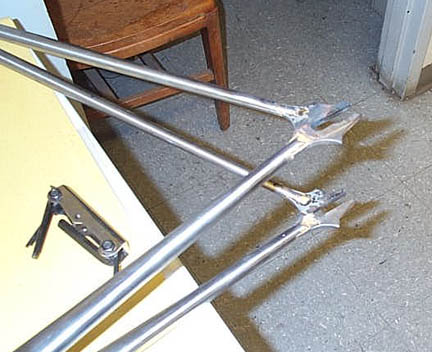
rechecking in the jig. filing the
SS miters was the same deal. slip it into the jig, mark what needed to
come off, and repeat as necessary.
ready to braze
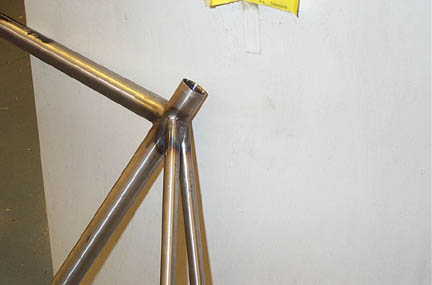
hey presto! these would probably look nicer if i knew what i was doing,
but whatever-- they'll work.
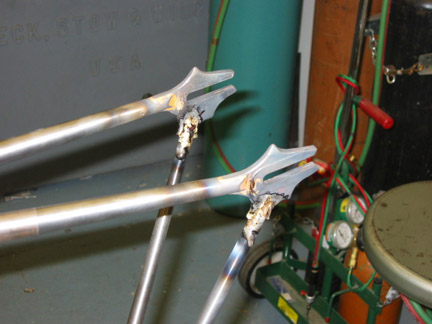
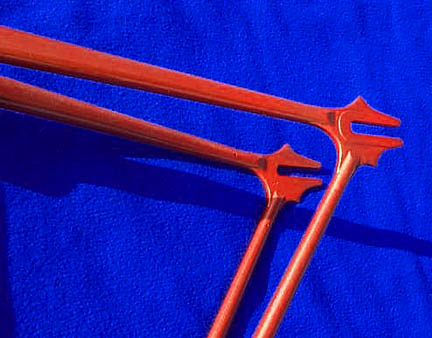
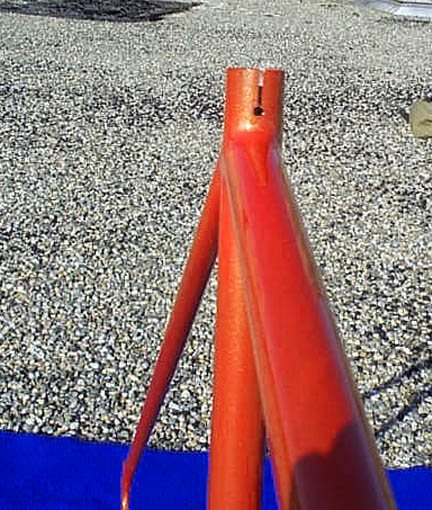
to attach the seatstays, i filed miters at the cluster junction, then tack welded them both at the cluster and at the dropout. This held them in place while brazing. I then broke out the torch, glued 'em up, and filed 'em down. you can see i got things a little hot. the thin stays got blackened flux at the peaks of the tubing in a couple places. i still think they look fine, though. i think i generally overdo the brazing. i just keep pouring as much rod in there as i think i can get. i probably dont need that much, and i probably dont need to nuke the tubes as much in an effort to suck the filler down.
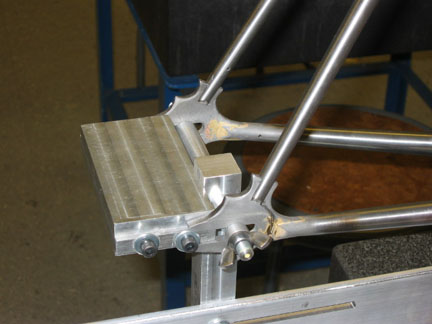
welded to the cluster. the angle was tight here, as the stays are straight, and the chainstays are short. i couldnt fit the electrode and the filler rod into the underneath notch with any comfort, and i couldnt see a damn thing anyway, so i invented TIG-brazing. i put the frame upside down, cut up a filler rod into small 1/4 long pieces, and kept putting them down there, nuking them with the TIG torch, and putting more in as necessary. worked a charm, but it did get thigns quite hot. even without a butted tube, this seemed fine. i had a slip fit copper heatsink in there, and it kept thigns under control. very minimal bead dropthrough. very little reaming later.
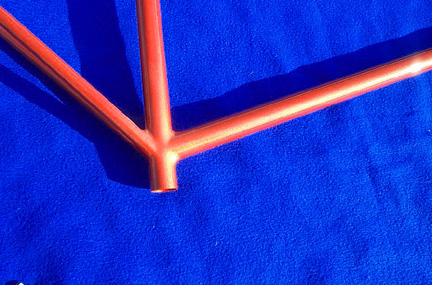
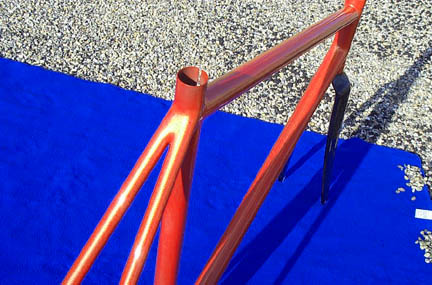
after the ST cluster was done, all teh welding was complete. however, i have deviate views on what looks good in a joint, and i decided i was going to attack the frame with a lot of bondo. this is untested, and i didnt ask anyone, so who knows- it may all crack and fall off on the first ride, but whatever. as the project has advanced, it has become much more than this frame. i have been learning as much as i can in the hopes that i can build frames forever. well, this is my experiment. besides this body work, i plan on painting it a tricked-out pearl (very complex), which will doubtfully come out well, but its worth a shot, and im trying to keep the learning curve steep. in this picture, ive slapped a bunch of metal-2-metal aluminum filler onto the joints. later, i will go over the top with bondo glazing putty. i didnt spent much time sanding. i never got down to 440 grit (horrors, they say!), and i never wetsanding a single thing on this bike. the truth is, that im out of time. this doesnt bother me much. one could say that it is a shame to spend so much time on the bike but then half-ass thigns in the end. well, im not worreid about it. i need to get this done before the shop closes, im out of time, and i can always build another bike. and another. and another. and another..
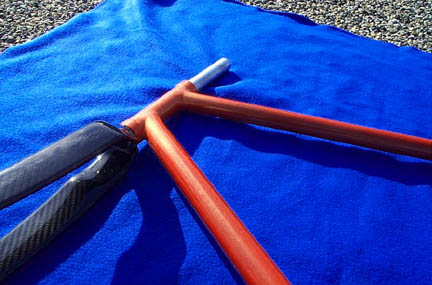
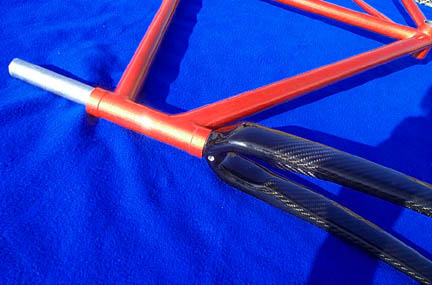
remember how i said i didnt get a silver fillet when i soldered on the HT rings? well, now ive got a bondo fillet. i also took the liberty of doing my own facing and reaming. i figured the BB is fine, but the ST needed reaming to get the weld drop out. i did this with an adjustable reamer and a huge tap handle. the HT i did with the adjustable reamer, and it seems to be fine. however, next time i will be sure to make a centering attachment to force it true. i made my own facing tool from a cutterhead which worked a charm, coudlnt ask for better. in the future, i wil buy a replacement cutter which reams/faces from park or one of the other companies, and build a tool around that.
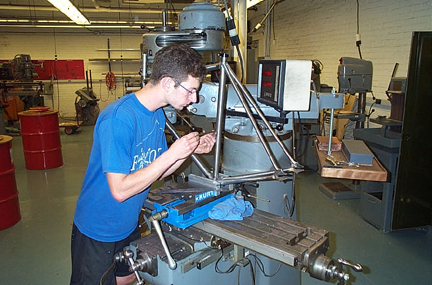
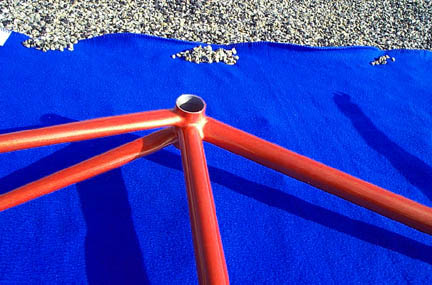
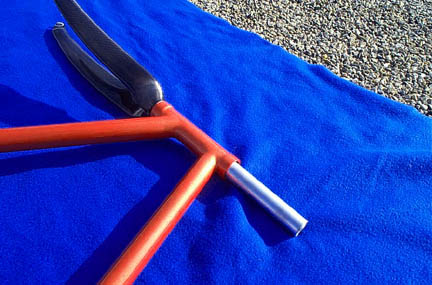
alignment check. you cant see it in the picture, but there is thin wire
stretched across the outsides of the dropouts, over the HT. it turns out
that i was .6mm out of alignment, or .3mm on center. i figure this was
pretty good, but i
straightened her out anyway. rear spacing stayed true at 120mm. im assuming that the front triangle is still true, with the ST/HT in the same plane. they were when the front triangle was done. note: i actually did this before the bondo-ing, so i wouldnt be bending the joints back and forth.
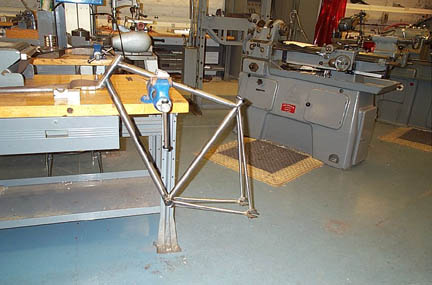
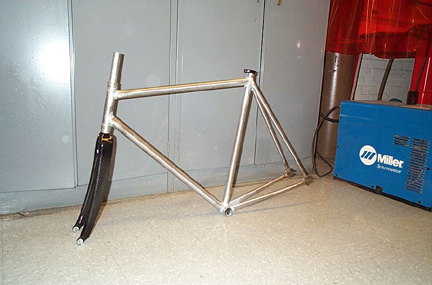
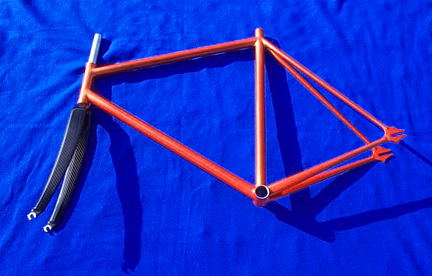
the welded, bondoed, frame, dummy HS, and fork.
next came painting. i dont have pictures of this, as i was unable to borrow a camera, but it was a complex process. i knew it was goign to be, and i waws actually quite nervous, but it turned out well. it is not a pro job, but it is far beyond what i expected, and i am pleased as punch. the rundown is as follows:
i bought dupont chromabase tri-coat paint from the local paint store. i chose wine red with a champagne/gold pearl, got the appropriate clear, thinner, activator, some alcohol wipes, some 3M adhesive remover, and some green self etching primer from another company. i did not want to bother wiht the acid etch, so self etching seemed to be the way to go. i have to say, however, i have talked to numerous experts about painting. some folks from the framebuilder's list, three guys at different times at the paint store, another place on the internet. i have got conflicting information from everyone, which leads me to believe that there is a little leeway in how you go about your painting process. based on my time, money, and convenience restraints, i did the following. disclaimer: it looks fine now, but it might all fall off next week. all part of the learnign experience.
first, i fucked up. yes.
after degreasing before bondoing, i then never touched the joints with my bare hands again. next, i brouught the frame to the place i woudl be painting. my chosen place was the subbasement metal shop of the architecture building on campus. there are no spray booths on campus, and no one woudl let me use theirs around new haven, so i chose the metal shop as the place which pumps the most air through. unfortunately, it is right next to an enormous woodshop, fabrication lab, and materials lab, all of which are full of foam dust, sawdust, years of lint, and the assorted crap which ends up stuck to wet paint. i decided to paint in the middle of the night, so as to avoid people running around stirring up these various airborne contaminants. it was a surreal experience, to say the least. school term is over, so even though i have key access to the basement rooms, i coudlnt get into the building, so i had to prop a back door and jump a tall gate everytime i needed to get in or out. after a few trips back and forth between the shop and my room to transfer paints, chemicals, and wait for the glazing putty to set up, i headed over to the shop around midnight for the long haul, equipped with a half gallon of soymilk, a respirator, and a big box of golden raisins. i set up a hanging bar to go through the HT in the shop in the airstream to the main vent. i then brought in six lamps so i could see what i was doing (but just barely, dangit). i misted the room down, as best i could, and set the central air compressor to send me 40 PSI instead of the normal 120 it usually runs. i only have an airbrush, a paasch VL, so i set it up with the biggest nozzle and needle it came with, slapped on a disposable watertrap, and hoepd for the best.
with the frame in the adjacent room, i sanded the entire frame down with 220 grit paper, and grey scotchbrite around the joints. i then donned gloves, and from now on never touched the frame again with bare hands. i brought it into the spray room, and hung it up. it shoudl be said that i was scared shitless of fisheyes. i didnt know what a damn fisheye was, nor do now, but id heard that they suck from a whole lot of people, that even some degreasers will leave enoguh film to make them, and that you cant be too anal about cleanliness. i was also particularly worried becuase of all that cutting fluid that was washed all iover the porous bondo earlier. so- i degreased the frame with the adhesive remover, which is what the auto shop recommended. i have to say, the aerosol can was very very convenient. i wiped it down with a regular paper towel. and then degreased again, wiping down with a regular paper towel. i then rubbed everythign down with a clean grey scotchbrite, and degreased one more time, wiping down with a paper towel. i then broke out the lint-free alcohol wipes, and wiped the entire frame down. it looked clean, so i figured i was good to go.
my primer was in an aerosol can. this was supposedly to make it easier. i now regret it, but i didnt know better. i thoguht airbrushing was going to be difficult. the primer went on nicely, for the most part. i was pleased to find that for the entirety of the frame i never got so much as one run. however, the aerosol can didnt suit me, in that it every once in a while would splatter a droplet of primer onto the frame, instead of atomizing it. this woudl result in a very small circle of primer just barely raised off the surface of the tube. in the beginning, when i didnt know what they were becuase i hadnt caught the can red handed, i figured these were fisheyes. after two coats, i let it flash off for the reccomended hour, and came back with 220 grit paper, and a smidgen of 800 (all i had) and sanded these imperfections out. i then wiped down with an alcohol wipe, touched up the imperfections with two coats, and put on one more complete coat. coverage seemed fine. the frame looked quite nice with the matt surface.
after letting it flash an hour i started the color coat (btw, currently 5:15 am, saturday night). i was pleased to find that the airbrush was working like a charm. i dont know what is so great about auto detail guns, but i didnt have a single problem wiht my airbrush. i never wanted to be able to spray more paint. i never had atomization problems, or coverage or control problems, or anything. it was all straightforward, and the double-action was nice for control. do autoguns have that? anyways, it went perfectly. my biggest cup held just enough for four coats, and i put them all on in quick succession. three coats didnt look like enough. perhaps auto guns spray more paint, needing only 2 or three coats. however, i like the control. my coats took me 4-5 minutes each, maybe they take less time with an auto gun.
at the auto store they told me 10-15 minutes flash time for everything between coats. i didnt wait 10 minutes even once. the paint seemed to be flashing as soon as it hit the tubes most of of the time, so i generally waited 3-5 minutes, which is coincidentally what the can suggested. i figured if it looked ok, then it probably was, and the less time sitting around in the dust the better. everytime i finished a coat, i would switch cups, and spray the gun through with lacquer thinner to clear the line. then take the thinner out and spray the gun free. i didnt want thigns getting gummy inside my delicate airbrush. to put the paint cup back on, i would spray whiel attaching the cup so there was no danger of thinner backwash into the paint. i found myself, every two coats or so, sitting on the floor with a nail and a very tender touch pulling lint off the tubes with regularity. how do you folks do this? or does it just not happen when you have a real spray booth?
four coats of color. four coats of pearl (metallic powder in a suspension), and then the clearcoat. the clearcoat was tricky. it was fine for the color and pearl to flash quickly, btu the clear woudlnt run together. i sprayed 4 coats, and then reloaded the cup, and did four more, with only certain areas getting slick. i was nervous at this point becuase i didnt want to lay in too heavily and get a run, but it seemed like i was going to have to be less conservative or i would have a matte finish. so i laid in. dwelled much longer whiel spraying. i still couldnt make the entire bike clear-candy coated. the overspray seemed to make a matte finish on the sides of the tubes i was spraying, so i ended up choosing my battles, laying it in heavy as i thoguht i could, and making sure that the last part of the tube i did was the most visible. in the end, i have a few bits which have a matte finish. the insides of the chainstays near the BB, i think, are matte. everythign else looks pretty good. one phenomenon i saw which i have no idea what it is- if i went lightly, i woudl get a white crystalline buildup on the tubes. i think this was the advanced staged of the matte finish. perhaps the clear was flashing *Before* hitting the tube in these cases? Anyways, recoating made it go away, and it only showed up like a faint dusting of confectioners sugar in two completely non noticeable parts of the BB and dropouts. honestly, it looks fine. you'd have to look for it, so im happy as it is.
at 9:15 in the morning, i let the final clearcoat set in for ten minutes, and then moved the bike to a room with still air where i chekced her out. seemed quite nice. i bummed around for an hour, cleaning things up, and then toted her back to my dorm room where i pulled the BB masks off, hung her up, fell asleep, happy, and grateful for rest. after 8 hours of hanging up, i took her outside for some glamour shots. i have to say- this project has been incredible. i am ecstatic that i have learned as much as i have, and can now makes bikes. i have made the tooling i need, so that in the future i will not necessarily need a machine shop for anything. in addition, i am intrigued by fillet brazing, as it needs only a 250 dollar torch, and produces the look im actually goign for anyway. i think TIG beads look puny and cheap. not that i dont like them. but i think a fillet is a beautiful thing, far better to my eye than lugs, and i look forward to what the future holds. most likely i would need to make a new jig for fillet brazing, or do it without a jig, but i guess i could figure it out.
she will be set up as a brakeless track bike with sora cranks, 42-16, suzue basic hubs, and ill lace a front wheel with 3 leading 3 trailing 36h for a good look. black saddle. black handlebar tape. (and remember- i bought the fork). even if the unexpected happens- the bondo cracks, the paint peels, i crash- it will be ok. this bike is the first of many. total cost for project- 42 dollars tubeset, 160 dollars painting supplies/paint (enough for two more bikes, easily), apx 150 dollars components, and an estimated 120 dollars in shop materials, tooling, metal, etc, that the shop generously took the bill for (and i get to keep the jig, fabricated tools, etc). This project would not have been easy without the framebuilder's help. So many of you have helped me out, i cant list all the names. Thanks again. Also- many thanks to Bryan Galipeau and James Athey for letting me constantly borrow their digital cameras. Bryan in particular- i practically owned his camera this semeser. The greatest thanks of all go to David Johnson, the head of the chemistry building's shop, where i have been working. Dave probably didn't know quite what he was getting into when i asked him to sponsor me for an independant study in building a bike (didja' know im getting credit for this?..). anyways, he helped me out constantly as the semester wore on, and i cant thank him enough. here are the pictures.
fin
|